Tl;dr: skip to Putting It All Together to read the conclusion without having to read the adventure it took to get there.
Overview
This is part 3 of a multi-part series where I do a deep dive into Adobe InDesign’s export to HTML functionality, with this post’s focus on images.
Part 1, Exporting InDesign to HTML: The Basics took a look at exporting basic document elements: title, headers, text (including bolded and italicized text), bulleted lists and numbered lists.
Part 2, Exporting InDesign to HTML: Tables took a look at the steps necessary to export semantically correct tables from InDesign to HTML.
Background
I much prefer posting long-form documents to the web as HTML. It’s not that I dislike PDFs, but experiencing a PDF on a smartphone and, sometimes, on a tablet is irritating. But creating a PDF is much faster than marking up a long document in HTML.
Enter Adobe InDesign, a document production app most often associated with print documents (and PDFs). But in the past few years Adobe has worked to make it viable in the digital publishing space. And one aspect of that is the ability to export a document to HTML.
That functionality intrigues me because the potential efficiencies created by a fully-featured, well-executed export function are measurable. So I decided to do a deep dive into this with three questions framing my assessment:
- How semantic and clean is the markup on export?
- How does a complex document export to HTML?
- How robust are the options when exporting to HTML?
The Approach
I want to continue being methodical about this, so that as I found pitfalls in the process I would be able to know where to fix things and adjust along the way.
My approach:
- In a change from my previous posts, I did not update the source Word document. In my experience, images (or other vector or raster graphics) are usually independent files placed in InDesign;
- Identify often-used elements, like a photo caption and a photo credit, to ensure that images needing those elements export correctly;
- Use the standard paragraph and character styles found in Word, if possible, to be consistent across apps and, if not possible, create the necessary new ones; and
- Iteratively add complexity once I met with success doing the simple markup export and successes with each level of complexity added.
Often-Used Elements with Images
In many instances, a placed graphic will need a caption or a credit of some kind. And in those instances in HTML, the following things need to happen:
- The
<img>tag should be wrapped in the<figure>tag;
- Solution: Create paragraph style called Figure, assign
<figure>tag to export tag
- Solution: Create paragraph style called Figure, assign
- The
<img>tag’s alt parameter needs to have content added;
- Solution: select the image, right-click, then choose Object Export Options…
- The image caption and/or credit needs to be wrapped in the
<figcaption>tag;
- Solution:
- create an object style called Image Figcaption;
- Assign
<figcaption>to the Export Tagging and assign it to the text box containing both the caption and the credit (both of which have their own paragraph styles;
- Solution:
Export Attempts
It took me 28 export attempts spread across several hours over the course of several days before I finally had the HTML exporting correctly. Rather than detail each of those attempts, I’m just going to go directly to the solution.
Putting It All Together
This is a multi-step process involving creating paragraph styles, object styles, text and image frames and grouping them all together. Once one is created, though, it can be added to an Adobe CC Library so that it’s easily available whenever it’s needed.
Create New Paragraph Styles
- Caption: create a new paragraph style named Caption and in the “Export Tagging” option assign:
- Tag: p
- Include Classes in HTML: checked
- Class: caption
- Credit: create a new paragraph style named Credit and in the “Export Tagging” option assign:
- Tag: p
- Include Classes in HTML: checked
- Class: credit
- Figure: you’ll never actually assign this style to anything, but one of the Object Styles you’ll create below does; it’s necessary for spacing. Create a new paragraph style named Figure and in the “Export Tagging” option assign:
- Tag: figure
Create the Object Styles
Ended up creating three object styles: one called Figure, one called Image Normal and one called Image Figcaption. Combined together, these three object styles successfully create almost semantically correct HTML output.
- Create the Figure object style :
- Anchored Object Options:
- Position: choose Inline or Above Line
- Select Above Line
- Alignment: left
- Space before: 0
- Space after: 0
- Alignment: left
- Export tagging:
- Tag: enter figure
- Anchored Object Options:
- Create Image Normal object style
- Basic Attributes
- Paragraph style: assign Figure
- Text Wrap: off
- Anchored Object Options:
- Position: choose Inline or Above Line
- Select Above Line
- Alignment: left
- Space before: 0
- Space after: 15
- Export Tagging: leave set to [automatic]
- Export Options > Alt Text choose Custom from “Alt Text Source” menu
- Basic Attributes
- Create the Image Figcaption object style
- Basic Attributes
- Anchored Object Options:
- Position: choose Custom
- Anchored Object Reference Point: choose the upper, left-hand square in the grid
- Anchored Position Reference Point: choose the middle, left-hand square in the grid with:
- X Relative To: choose Text Frame with X Offset at 0
- Y Relative To: choose Baseline with Y Offset at 0
- Export Tagging:
- Tag: enter figcaption
- Anchored Object Options:
- Basic Attributes
Create a Group of Text and Image Frames and Assign Object Styles
These three object styles need to be combined together to create one object that will export to semantically correct HTML for images with captions and/or credits.
- Create a frame and assign it the Figure object style. Make sure the frame is wide enough to stretch from the left to right margin of your document and tall enough to take up about half a page.
- Create another frame and assign it the Image Normal object style. (It helps to place an image in the frame.)
- Create a third frame and assign it the Image Figcaption object style. In that frame insert the following text:
- Photo credit and assign it the Credit paragraph style
- Caption and assign it the Caption paragraph style
- Select the Image Normal frame and cut and paste it into the Figure frame.
- Select the Image Figcaption frame and cut and paste it into the Figure frame below the Image Normal frame
Add it to Your CC Library
Add this new group of frames to your “Presos, Proposals and Pubs” CC library so you can easily insert this into documents later.
- Select the Figure frame
- From the CC Library palette click the + button and choose Graphic.
Inserting a Figure
Insert the Figure text frame inline wherever you need an image placed.
Exporting to HTML
On my 28th—and first successful—export attempt, I used the following settings.
Export Screen
To export to HTML:
- Choose Export… from the File menu
- In the “Export” window:
- Enter a filename in the “Save As” field (it is pre-populated with the name of your InDesign file)
- Choose HTML from the “Format” dropdown menu
- Click Save
- In the “HTML Export Options” window:
- General: I left everything as-is
- Image: I left everything as-is
- Advanced: I chose Include classes in HTML with Generate CSS and Preserve Local Overrides not checked.
- Click OK
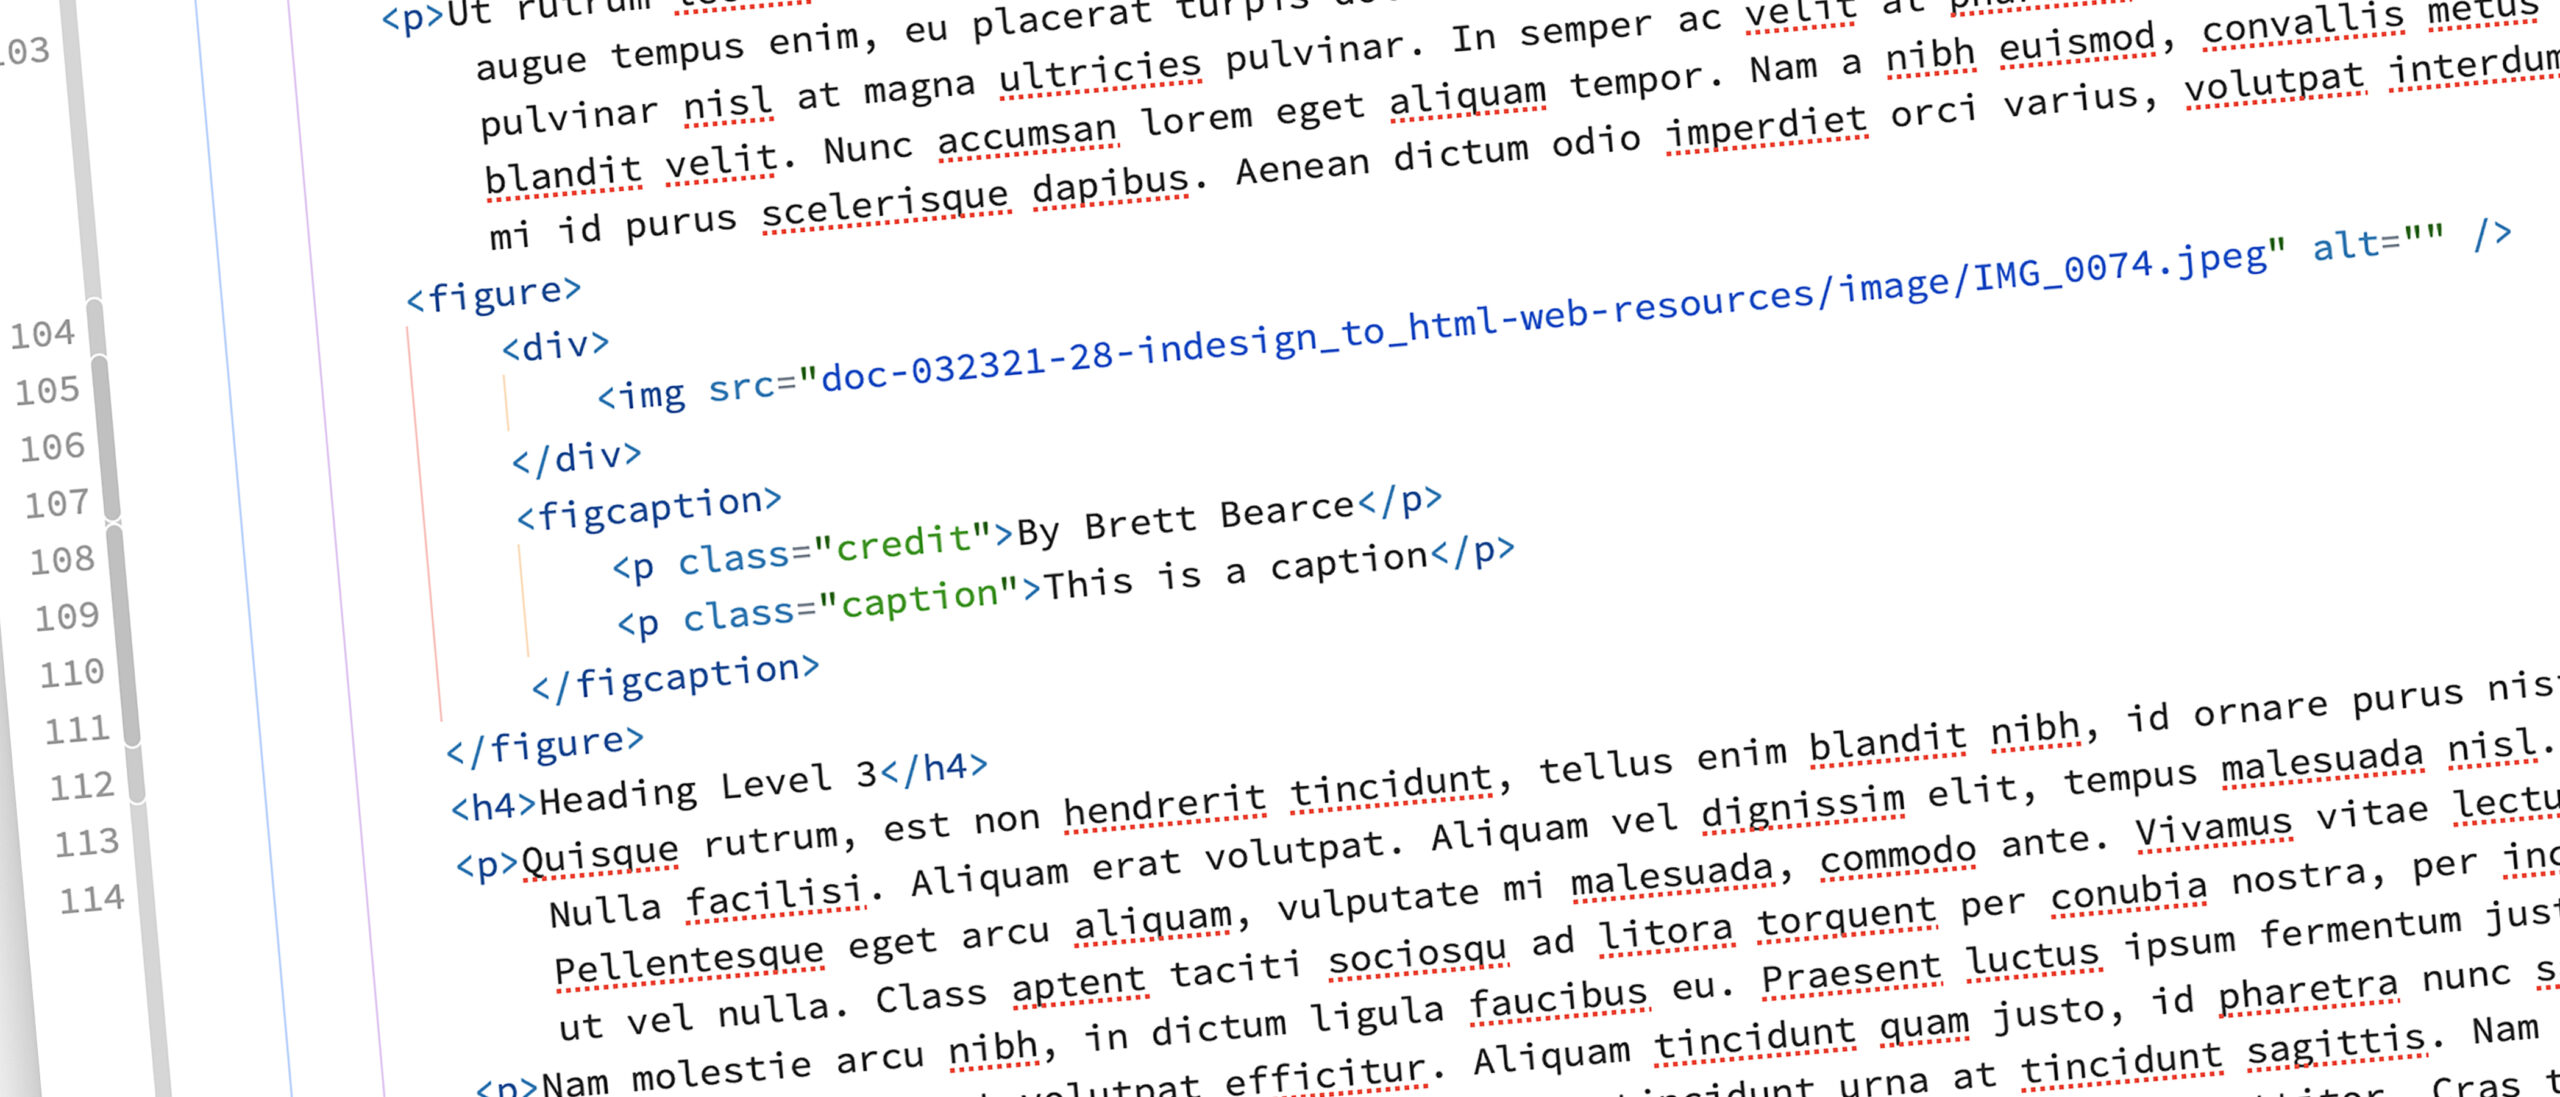
HTML Markup Review
A quick review of the markup shows a semantically correct marked up image.

What’s Next?
I’ve covered mapping the basic HTML tags in part 1 and exporting tables in part 2. Those two entries, combined with this post about images, should cover the majority of use cases. There are, however, often-used HTML tags that do need to be addressed and I’ll be taking a look at those in my next entry in this series.